
What did I mention about Stonehenge that I didn’t cover last post?
…
…. well, it’s made of stone. There’s a hint in the name. There’s your obscure fact for the day.
As for the second part of the name, that’s a bit more complicated. The term ‘Henge’ doesn’t refer to the stones. “Henge” is used for a certain type of ancient monument; it refers to “a circular earthen bank with a ditch inside it and one or more entrances through the bank“. However, in the case of Stonehenge the ditch is outside the raised soil, meaning it technically isn’t a true henge. The name ‘Stonehenge’ was in use since about the 12th century; At the time this name was used, the word ‘henge’ was an Old English word(possibly meaning hang or gallows). Just to make things more confusing, the modern term (ie. Henge referring to an archaeological feature) was taken from the name ‘Stonehenge’.
To sum it all up, the name ‘Stonehenge’ is the origin of the modern word ‘Henge’, but Stonehenge itself does not fit the definition.
… and I think I’m done with this line of inquiry. I’m just here to show pretty pictures, not to deal with etymological paradoxes.
Anyways, this time I’m looking at the photos I took outside of the visible spectrum. I posted a 3D infrared photo last time, and am sticking with 2D photos this week.
On this trip, I only took a few of my camera filters. In retrospect, I would have loved to get some 680 nm photos, but at the time, I only had so much space to pack things, and I decided to cut back on my camera equipment. No ultraviolet photos either. I had the right combination of filters, but didn’t have a good lens for taking a photo. Add in the low sun, and I figured that there wasn’t enough light to attempt the photo. I had no tripod or way to keep the camera still, and I think the security guard might have discouraged me from propping the camera up on one of the stones. Given my other UV landscape photos, I don’t think I missed too much. It probably looks close to the blue channel photo.
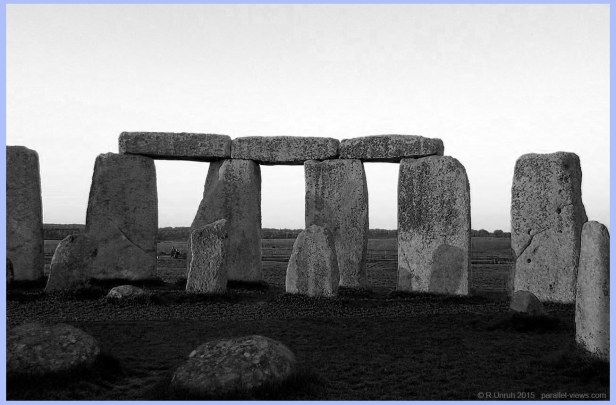
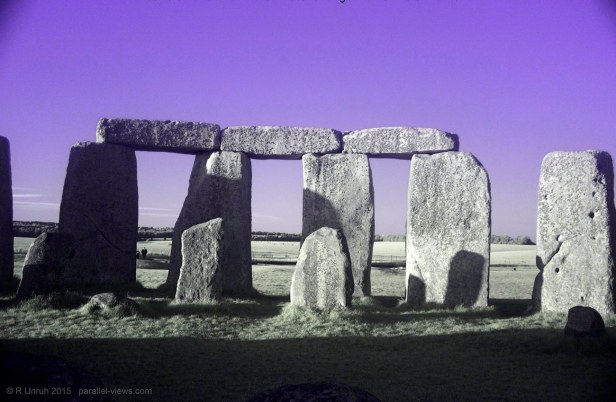
First up, the visible spectrum.
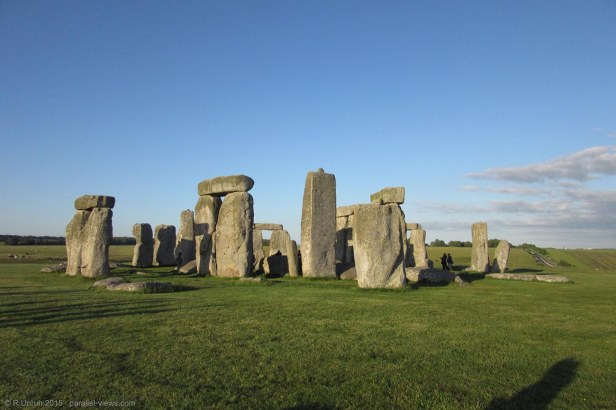
With the low sun, the stones(and grass) have a slightly yellowish hue that wouldn’t exist at mid-day.
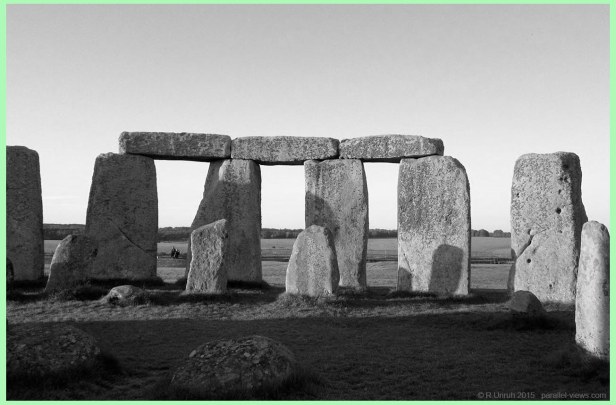
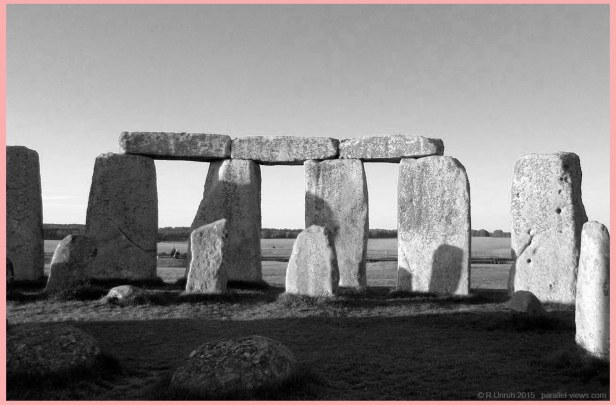
The above photo can be broken into the red, green, and blue channels. Again, the border of each photo indicates the channel.
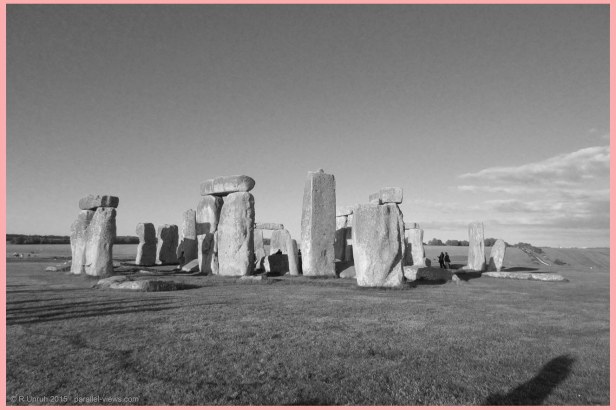
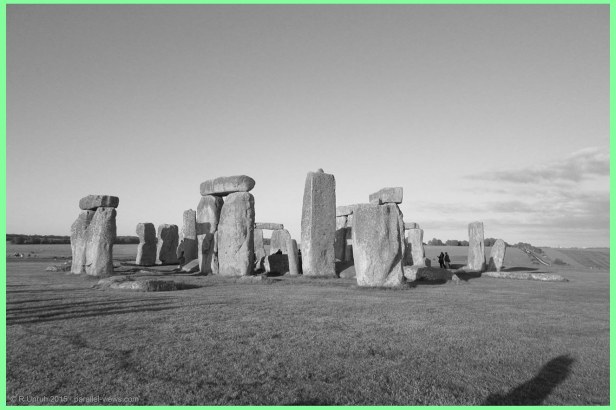

There isn’t much that is unusual in the three channels. The lichen(or is it moss? No, it’s lichen) on the stones seem to be slightly more apparent in the blue channel; the dead patches of grass do too. I’d expect the sunlight makes the red and green channels appear brighter. Again, taking a photo at a different time of day would likely yield slighly different results.

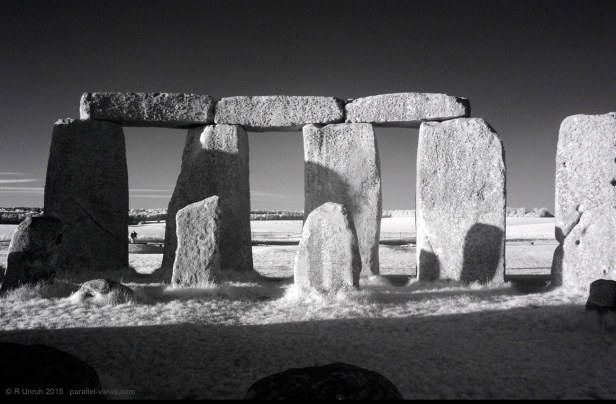
Dropping down to the infrared range, both the stones and the grass are almost the same shade. The lichens on the stone are almost invisible. This photo was taken with my lesser-used Zomei 850 nm filter. Once the white balance is set, photos with this filter appear monochromatic; There is no colour variation in the photo.
The sky in this photo isn’t as dark as in some of my other infrared photos. A close look at the visible spectrum photo shows some haze on the horizon; I assume that this haze is still apparent on the horizon into the infrared range. Without it, the sky would likely look pitch black, with a few lighter clouds.
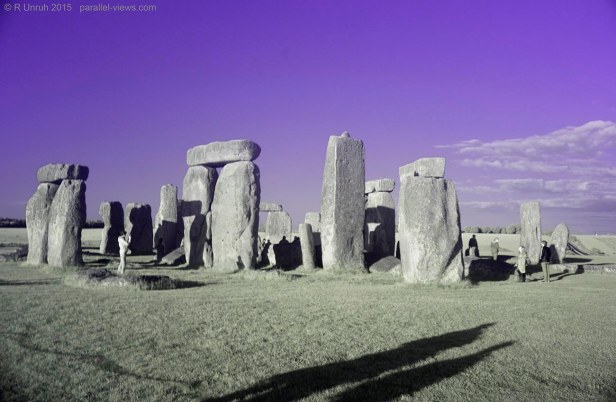
To finish off the photos from this angle, my Schott UG11 filter photo. This filter allows infrared and ultraviolet light through, but blocks visible light. The lichen is more visible again on the upper part of the stones. The haze is fairly visible in this spectra again. The grass can be clearly differentiated from the stones; while the stones are grey, the grass is faintly green(it’s all false colour, so the colour green is only due to the way my white balance is calculated).
What I wrote earlier about Stonehenge being made of stone? It’s actually made of two types of stone.

This photo was taken half an hour after the precious ones from outside the circle. The sun has gotten even lower, and the change in the colour of the sunlight is significant.
In this photo, the larger stones forming the outer ring are Sarsen sandstones, while the smaller ones in front are bluestones(or Spotted Dolorite, if you want the technical term). I’m ignoring the stones in the shadow in the foreground; it is too dark to see any detail of these stones.
The two types of stone look the same in the photo, and in fact, they’re pretty similar in real life as well. After looking at the two types of stones close up, I could eventually tell the difference, but it wasn’t easy, and the difference was never apparent in photos.
It isn’t any more apparent if the photo is broken into the three colour channels.
Again, the lichen is most apparent in the blue channel. The stones on the left are darker than the ones on the right; However, this is due to the angle of the sun hitting the stone rather than the features of the stone itself.
One thing I noticed is that the shadows are least apparent in the blue channel, and most visible in the red. I suspect that this is due to the bright sky at shorter wavelengths. Rayleigh scattering is the reason the sky is blue; the short wavelength light spreads across the sky and comes at the viewer from all directions. Some blue light hits the stone from all directions as well, and reduces the contrast of the shadows caused by the sun. The longer wavelengths don’t spread out in the atmosphere as much, so hit the rock more directly from the sun.

Without any filter, my camera takes a full spectrum photo, which records infrared, visible, and ultraviolet light. Most UV light is blocked by the lens and the camera’s inherent reduced sensitivity, but a lot of infrared light still enters the camera. This shifts the colour of plants, which reflect a lot of IR light, further into the red end of the spectrum. The plants appear yellowish, as if it were autumn.
The setting sun, which already added a yellow tint to the stones, seems to also affect the infrared wavelengths. The stones also have a strong tint in this spectrum; in fact, the colour of the stones almost matches the colour of the grass. Still no difference between the two stone types.
Back in the 850 nm infrared range, the lichens seem visible. I’m not sure about why this occurs here and not in the previous infrared photo; again, it might be the angle of the sun reflecting off the lichen. The foreground stones(yes, I said I’d ignore them, but I changed my mind) are visible, but I think that the strong IR reflection of the grass brightens the shady areas; the stones still contrast the grass.
Finally, back to the dual band UG11 filter. I still cannot differentiate the stone types here; there is more variation between individual stones of the same type than there is between the bluestone and the sandstone. Again, as they are arranged in a circular pattern, this is mostly due to the sun hitting them at different angles. Once again, the lichen can be clearly distinguished from the stone. The grass is still faintly green.
If I revisited Sonehenge, I’d probably bring a fuller complement of filters with me, but revisiting it is fairly low on my priority list. The site was amazing, but there are so many other places to see if I go back to the UK. That said, the big downside with an ‘inside the circle‘ evening visit is that the museum, gift shop, and replica neolithic homes are all closed for the day. I could see myself revisiting the site, but exploring the interpretive areas and other nearby archaeological features(such as Woodhenge or Avebury). The Stonehenge monument could be left to the other tourists; I doubt I could top my first visit there.
No, I had a beautiful evening at Stonehenge, and felt satisfied with what I saw.
The above photos were taken with a modified Canon Rebel T3i camera.
