Well, I’m back. I saw the eclipse along in Idaho, along Route 93. 2000 km of driving for two minutes… and it was well worth it. I had always wanted to see a total eclipse, and it lived up to my expectations. So, to belatedly add to the millions of other eclipse photos already online, here are mine. Fair warning- the post is catagorized under ‘Multi- Spectra’, but most of the photos(and almost all of the good ones) are in the visible spectrum.
Unlike the crowds that I heard were in Oregon, I had no trouble with traffic or finding a campsite before the eclipse. I found a rough road leading to a trailhead in Sawtooth National Forest, and had plenty of time to set up a comfortable spot to see the eclipse.
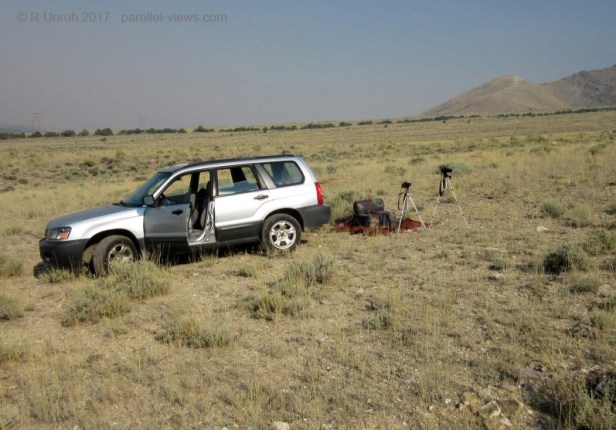
So, there are two cameras set up. The camera on the right, with a 75-300 mm telephoto lens, is my Canon Rebel T3. On the left is my full spectrum modified Canon Rebel T3i, with a 18-55 mm lens. I had my choice of spots to set them up; even half an hour before the eclipse reached totality, I had few ‘neighbours’ to contend with.
As for the eclipse itself- I made two collages. One is leading up to the eclipse, one is after the eclipse. The times listed beside each photo are for my camera- they might be a minute or two off from being completely accurate, but I tried my best to synchronize them.
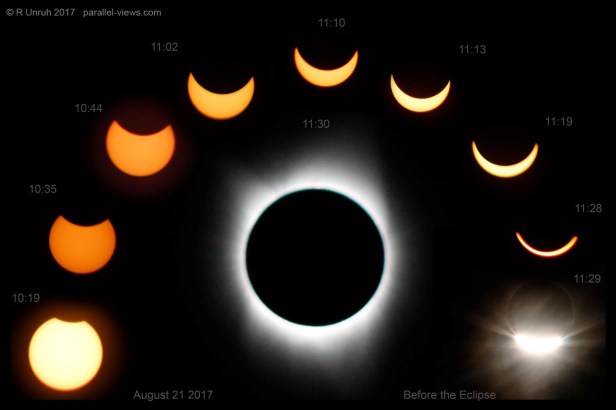
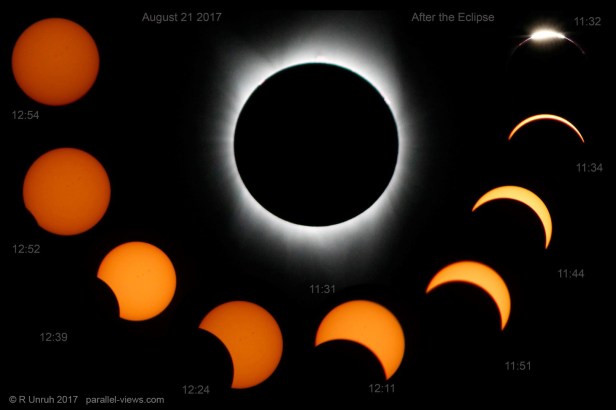
To take photos of the sun, I had a high end solar filter I attached to my camera and… I’m lying. I had been anticipating the eclipse for so long, but never thought of how to photograph it. My eclipse watching tools were a pair of eclipse glasses, and… another pair of eclipse glasses(spares in case I lost my other set). I took the photos of the sun by holding my spare set of glasses in front of the lens, then dialing the exposure compensation WAY down. It worked fairly well, and I got better at taking photos as the eclipse progressed. As the eclipse approached totality, I found myself having to play around with the exposure compensation settings to get a good photo. And of course, I had to use manual focus, as the ‘solar filter’ made automatic focus useless.
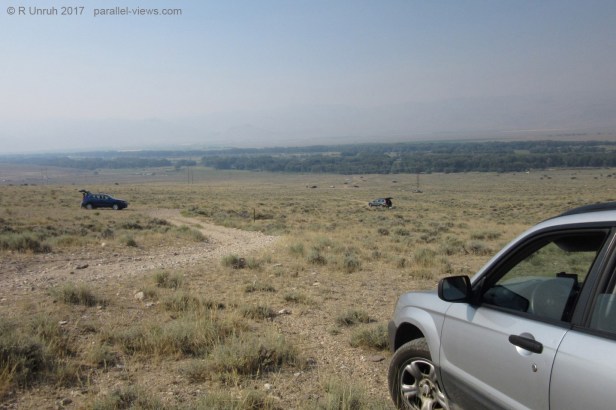
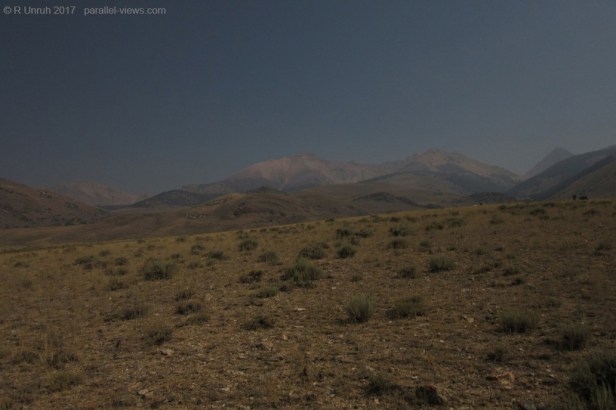
To me, the slowly darkening sky had been somewhat noticeable when the sun was about half covered, but with all the haze and fires in the sky in Canada, it wasn’t something that felt extraordinary. As you might notice from my photos, Idaho was also very hazy(in fact, I had worried that I would not be able to see the sun that day, but it was clear overhead). It felt like a sunny but smoky day, but not much more than that. About 10 minutes before totality, that all changed. Shadows were still visible, but the light seemed to be going away. Two minuted before the eclipse, the hills looked like this:
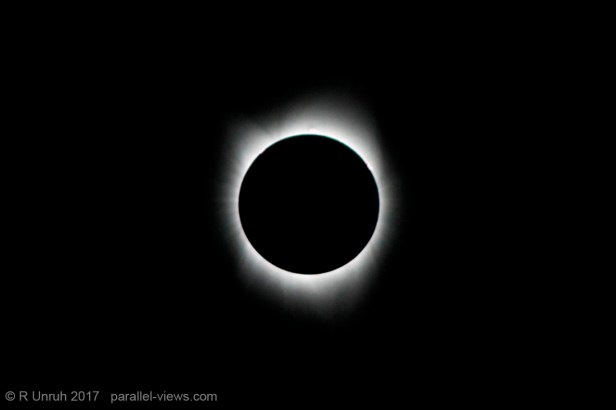
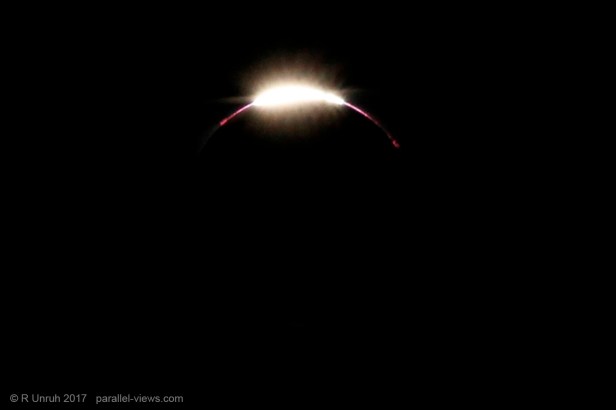
The last instant before totality, I finally took a photo without needing a solar filter to shield the camera.

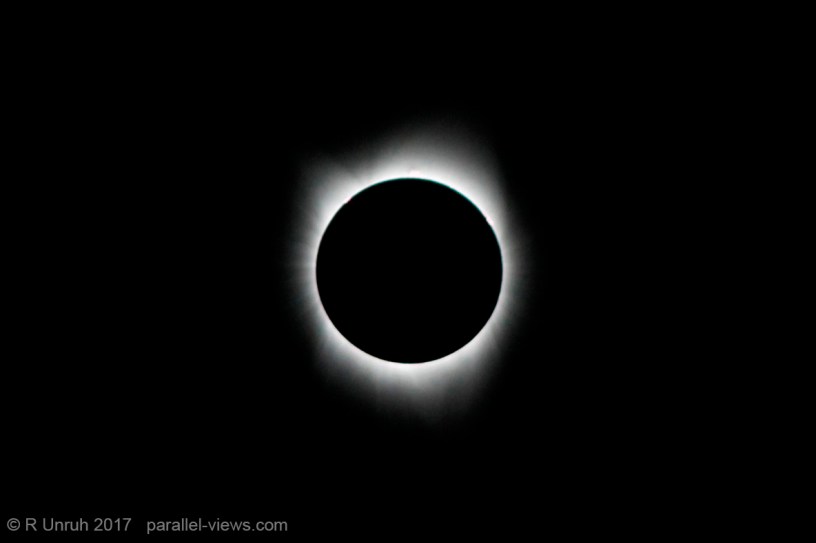
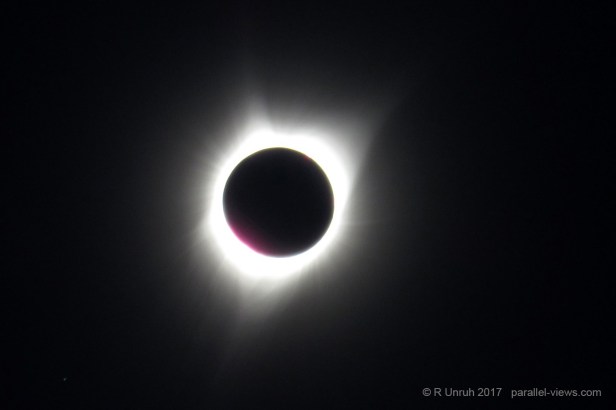
And then, totality. It is something that everyone needs to see for themselves; photos don’t do it justice. The sky is brighter on all horizions, but pitch black overhead. The sun is a ring of white fire, surrounded by stars. This is the portion of the eclipse safe to see with the naked eye.
As it was also safe for cameras, I had a chance to experiment more with the exposure.
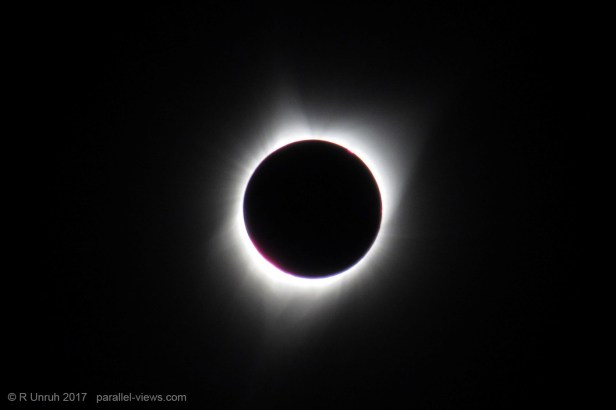
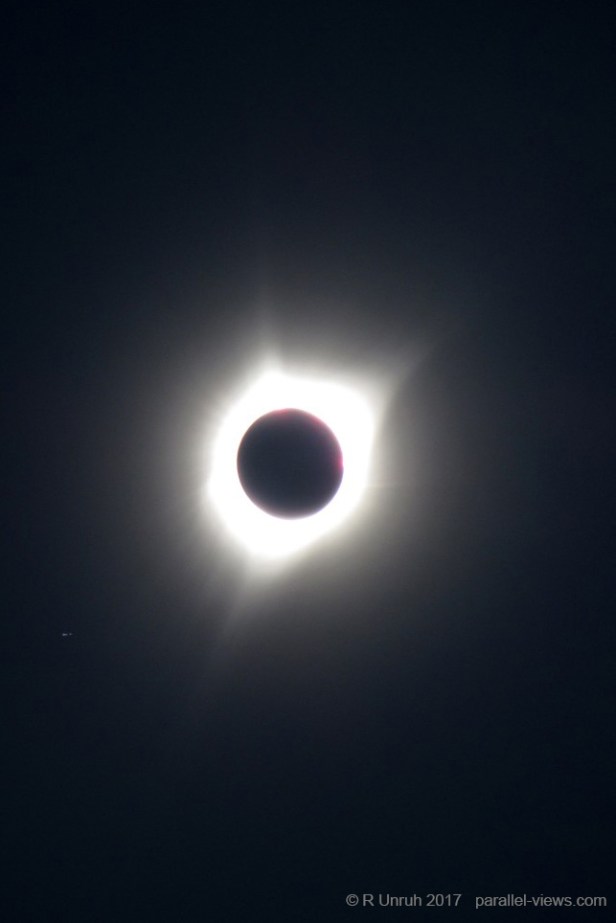
To the lower left of the photo below, you can see the star Regulus shining faintly.
and I boosted the brightness on the next photo to make Regulus more visible. Again, it is lower and to the left.
After a bit over two minutes, the sun started to come out from behind the moon.
And after that, it was back to using eclipse glasses.
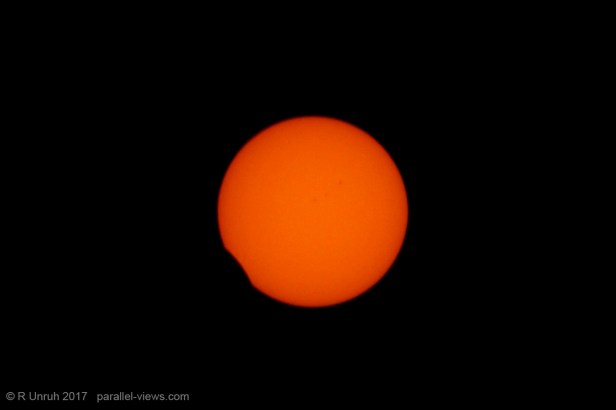
I’m including two photos taken after the eclipse- I found them interesting because of the sunspots visible in the photos. They were visible before the eclipse too, but these pictures turned out better. There are three sunspots above and to the right of the centre of the sun- they are all part of sunspot AR2671. Right next to the moon’s edge in the second photo, sunspot AR2672 is barely visible.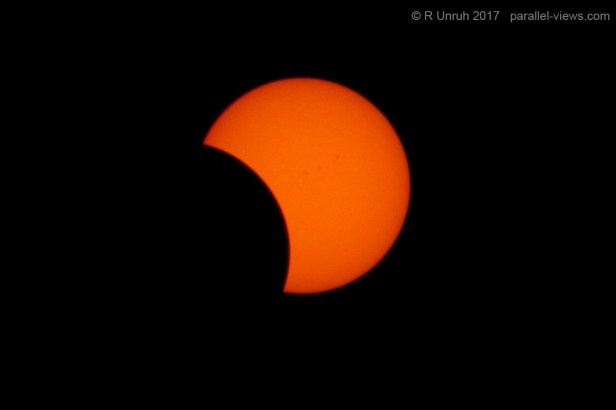
And that’s about it for the photos in the visible spectrum. As for outside that spectrum… well, prepare to be disappointed.
Near Infrared
With the lack of a telephoto lens, none of my T3i photos are as good as my above pictures. I did try, though. Here were the problems with photographing it outside the visual range.
1- a two minute(give or take) time limit for the total eclipse. This is the big one- I had to figure out the settings to take a good photo on this camera, my T3 camera, and actually have time to look at the eclipse myself. I defaulted to my visual camera for most of the photos.
2- No telephoto lens. Yes, I could have swapped lenses, but that would have taken time(refer to #1)
3- No experience with photographing an eclipse- I had to try to figure out how to take photos on the fly.
4- No viewfinder- With only infrared light coming through, I can’t use my viewfinder. Using the digital screen to focus the camera on the sun is much more difficult than using the viewfinder.
5- Long exposures. As only a fraction of the light goes into the camera, I had to take longer exposures.
In general, I could have compensated for these problems EXCEPT for the time limit. Next eclipse I’ll have a better idea of how to take photos… so see you in seven years?
I used my Zomei 760 nm infrared filter for most of the photos, but only a few were even close to turning out.
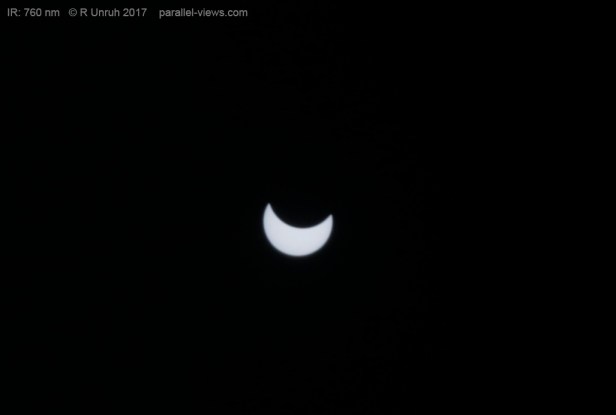
This photo was taken about a half hour before the eclipse. It isn’t bad, per se, but it’s… dull, I guess. There’s not enough detail to see anything unusual about the sun.
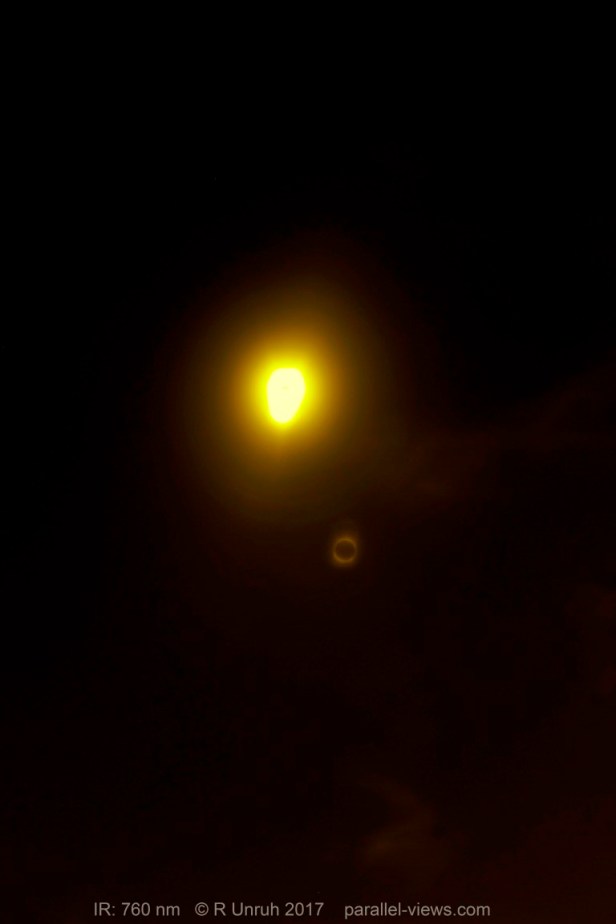
I don’t know WHAT is going on here-My best guess the shot(taken during the total eclipse) was massively overexposed, and the second eclipse is a reflection inside the lens. The white balance is off, too- I’m not sure why. Still, here’s the ‘ghost eclipse’ zoomed in and contrast enhanced.
Short Pass Filter
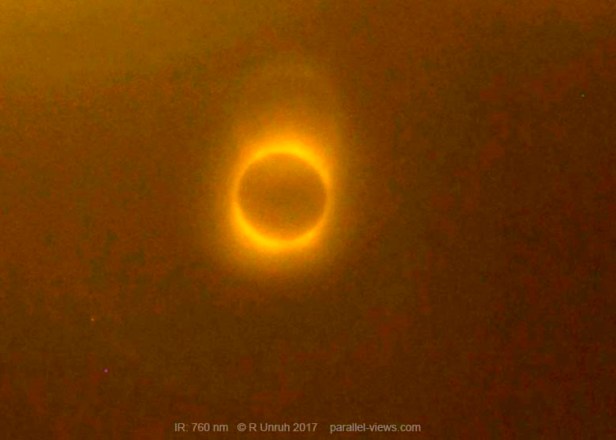
I only swapped the filters for one shot with my short pass filter(which allows the blue, violet, and ultraviolet wavelengths through). It was an 8 second exposure, and by the time the photo was taken, the sun was coming out again. Still, it looks better than my 760 nm photo.
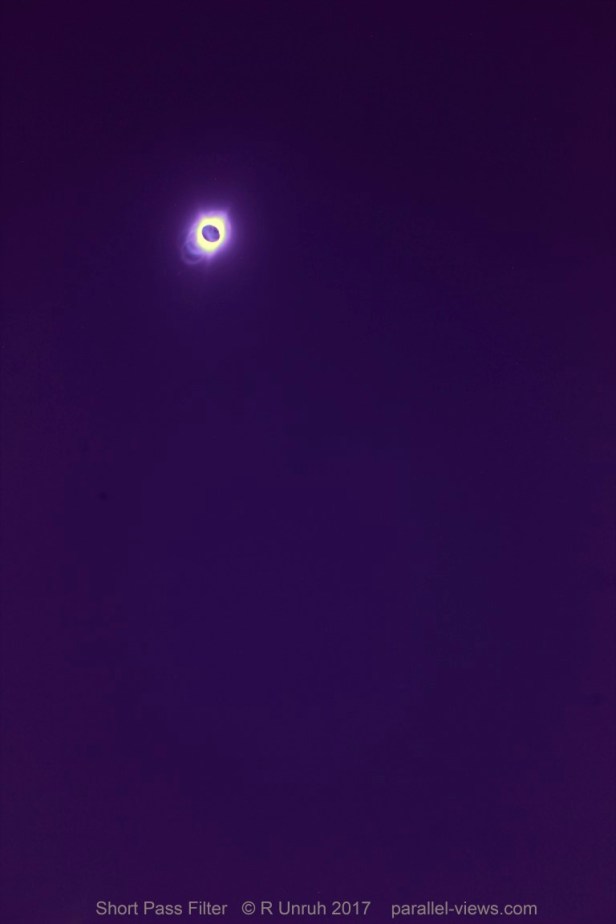
Here’s a zoomed in photo of the eclipse.
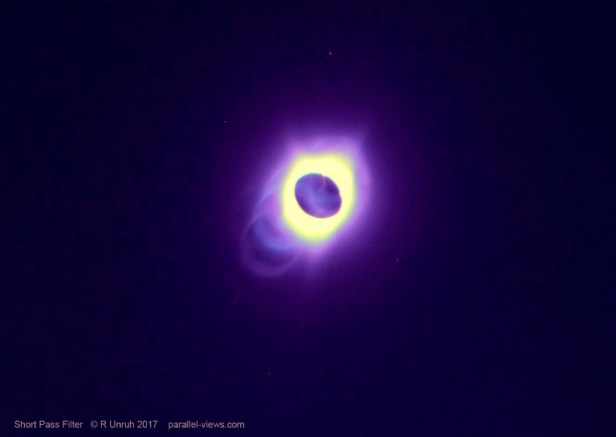
It isn’t bad, but I think it would have been much better if the sun hadn’t started to peek out at the end.
Thermal Infrared
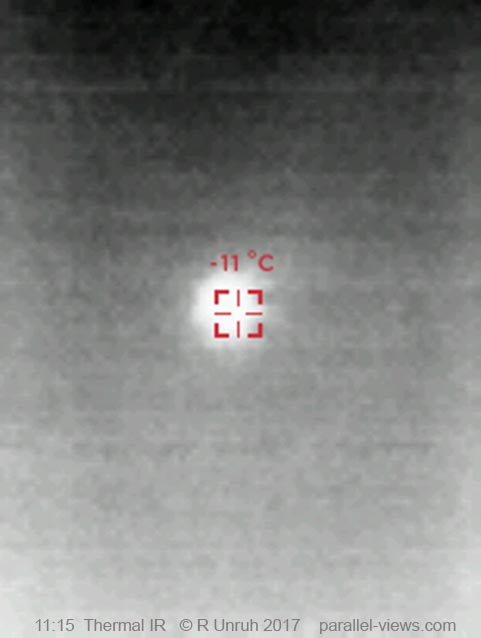
And then, there’s my thermal infrared camera. I took more photos with it, but as the photos are much lower quality and resolution, they aren’t as visually interesting. I stuck to the ‘white’ filter for my Seek Reveal camera when taking these photos.
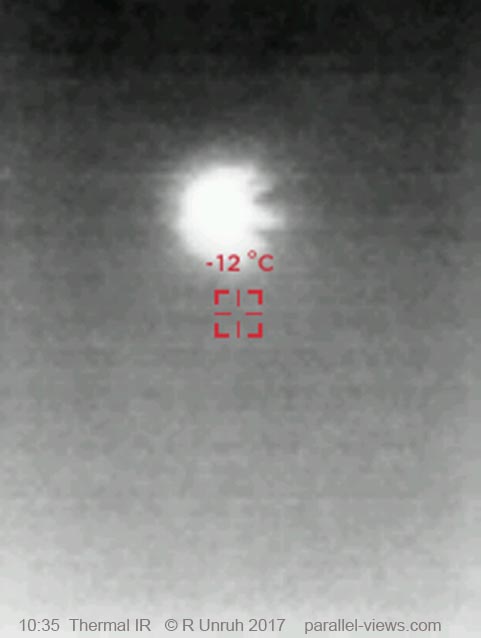
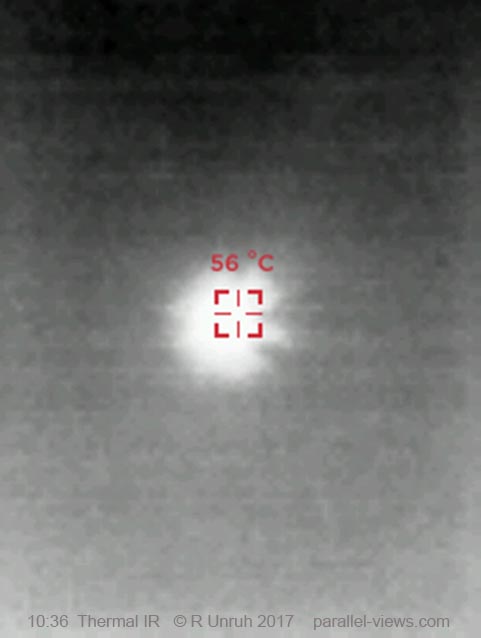
These two photos were taken about an hour before the eclipse, both at the same time. The only difference is where the crosshairs are focused- I wanted the temperature as pointed at the sun, but also to see the sun without the crosshairs, so took two photos. You can see that the sun is looking uneven in the photos, as if a couple pieces were taken out from the right side. Just as interesting is the temperature in the crosshairs. The heat signature around the sun registers as 56° C. Without an eclipse, I have seen the heat signature well above 200° C (and of course that’s not the temperature of the sun; it’s just how the camera reads something it’s not designed to look at).
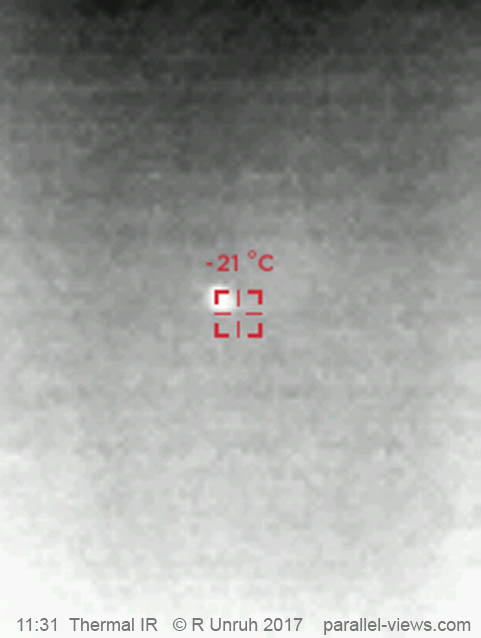
Fifteen minutes before the eclipse, and the temperature noted in the crosshairs is rapidly cooling.
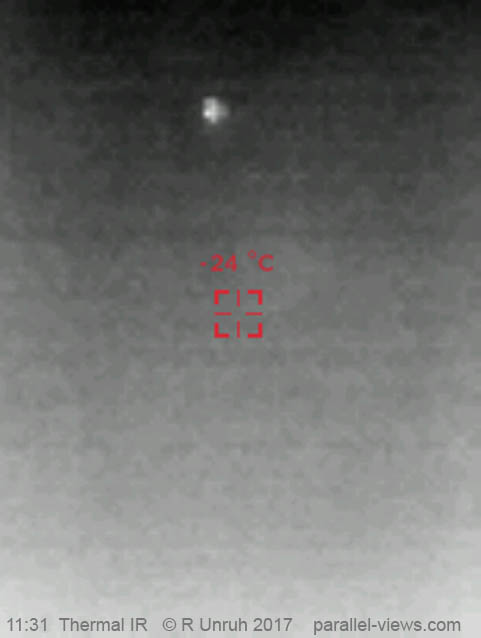
And finally, during the total eclipse, the heat signature is at its lowest point. It is worth mentioning that the Seek Reveal camera doesn’t have any zoom functions, so the pinprick of heat during total eclipse is on the same scale as the large sun before the eclipse.
And that was it. After the eclipse, I DID have to wait in the traffic- everyone left at the same time, give or take. My shortcut back to BC took me down through Nevada and California, before going back up through Oregon… come to think about it, I might not know how shortcuts work, but I had a good time.
